A few weeks ago, while traveling for a scheduled weekend camping trip, I had my first flat tire on my fifth wheel. It was not a big deal as it happened after we left I-95. In fact we were passing under the last traffic light before we turned into our campground.
The tire did not explode although it did make a loud thump as it let go. As I got out of the truck 100 yards later I could still hear air coming out of the tire. Obviously, the tire was totaled but it did not disintegrate.
After checking in, I dragged the rig through the entire park on three wheels and parked in my assigned space. I was more than a little concerned because I have no idea how far you can travel on three tires.
I was also surprised because I never move my rig without ensuring my tire pressures are correct. I even have an on-board compressor to use prior to leaving a campground. My tires were 4 years 8 months lod, the are light truck tires and asr made by BF Goodrich... Commercial TA tires.
The next day an old shipmate helped me jack up the rig and remove the tire. I purchased a new tire at Tire Kingdom and reinstalled it later that day.
The Tire Kingdom Manager said that happens often with fifth wheel (RV) tires when they are stored more than rolled down the highway.
When I got back home I pulled my spare, with took well over an hour to get loose from it's mount under the fifth wheel. The age of the spare was unknown since it had been in place when I bought the fifth wheel five years previous. The rim of the spare was all rusted, pitted and flaking so the entire assembly was disposed of.
I bought a new steel rim from a trailer shop on 301 in Hawthorne and 4 more new tires from Tire Kingdom to replace them all. The first new one which was made in excess of a year prior to my purchasing it on the trip (as the only tire available for 7 days) was dismounted and put on the steel rim as a spare. The other 4 tires were then mounted on the dress rims and placed on the fifth wheel.
After smashing my thumb while removing the spare, I realized the likelihood of reinstalling the spare tire under the fifth wheel was non-existent. There was no way I was going to hold up a 65 pound tire with one hand and start a not on a threaded shaft with the other while lying flat on the ground.
So I went on the internet looking for spare tire carriers and I found this:

Well I found others, but all of the others involved picking up a 65 pound tire. And in one of the videos, albeit was a motor home being discussed, The same thoughts hold true for any RV. And that basically was, flats often destroy rims as well as tires. And depending on where you are they may NOT be available and all costs getting them there will be absorbed by the person with the problem flat.
So after finding the best price, the sucker is not cheap but it is very well made IMHO, I ordered one and installed it.

And that was the easy part. It fit my fifth wheel just like it was made for it.

But the 9/16 inch bolts that came with it did not reach the bolt holes in the steel rim of my spare. So I decided to look for 6 inch tap bolts that would allow me to bolt them to the mount on one end of the bolt and to the tire on the other end. It seems that 9/16 inch tap bolts are not made or if they are made they are scarce and I found none on the internet. Oh did I mention they have to be Grade 5 bolts at a minimum.
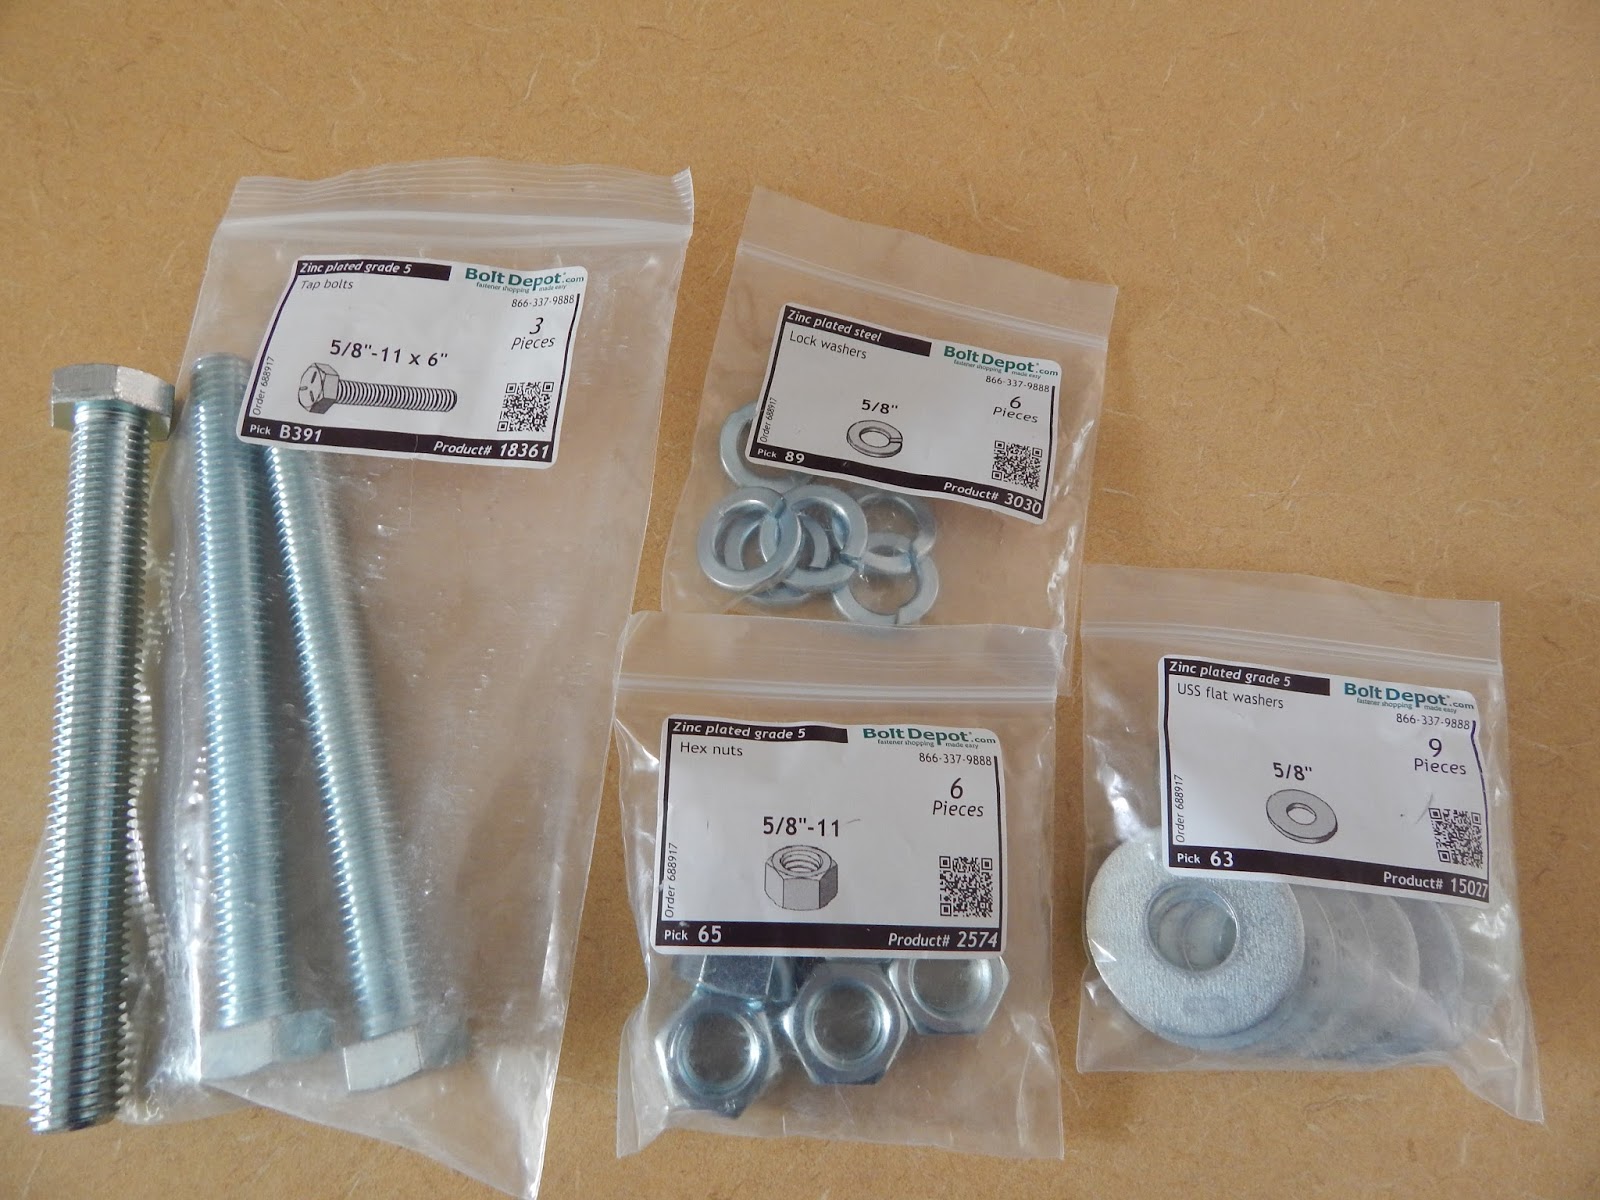
So here are my six inch long, Grade 5, 5/8 inch bolts as they arrived. I also got Grade 5 nuts, washers and lock washers at the same time.

A close-up

Now the slots and previously drilled holes in the mounting plate are alsso 9/16 inch so I also own a new 5/8 inch drill bit for reaming a 9/16 inch hole larger.

Here is the first 5/8 inch bolt ready to tighten in place on the mounting plate.

Here it is tightened down and the second mounting bolt 5/8 " hole has been drilled in the mounting plate. At this point things began to get a little more challenging. The mount normally uses 9/16" bolts which have more plan in the rim mounting bolt holes. Therefore with 9/16" bolts you can be a little sloop in alignment... NOT so with 5/8" bolts.. At this point, that 65 pound tire was going on and off the mount to many times to enjoy. The extra hole was drilled because I could not get a 5/8" bolt to align and it seemed a lot easier to add another bolt hole.

Another fun fact, the bolts never reall looked like they were parallel to each other, even when torqued down. The mounting plate slopes off on each side as you move away from the center.

Enter a homemade shim, made from a section of stainless water hose clamp.

Here you can see the edge of the water hose clamp shim peeking out from under the washer. I used one shim under the washer on the outer edge for each bolt.

Another view of the shim.

Both bolts are tightened to the back plate, the back plate is attached to the fifth wheel and spare tire mounting is about to take place. I am figuring out the location of the stop bolts that the tire rim will actually lock up to when tightened.

I used nail polish to mark where I wanted the stop bolts to stop. Nail polish also prevents the bolt from wandering while allowing me to move it if I so desire.

A look at the 5/8" bolt mounted to the back plate and holding the rim tightened in place.

Tire mounted and locked in with cable lock.

Job complete! Ready to go.
