Tuesday, August 11, 2009

Nana's Workbench Finished


Nana, my Blushing Bride, is a woodworker and hence she needs a workbench. I found a work bench kit in a Sportsman's Guide catalog a few months back but wasn't able to complete it because the garage was the victim of to much stuff. Recently we were able to get that down to "a lot of stuff" so I decided to build the workbench.

Again, Murphy's Law struck. The top of the workbench is basically two sheets of 3/4 inch sheets of plywood glued and screwed together. That piece was in the utility shed and my large dolly has a piece of equipment temporarily mounted on it so I used the small dolly to move the plywood. As I came over a small rise in the yard, the dolly took off downhill and kind of extended me under a load of plywood which I ultimately dropped in the road. As I bent to pick it up, my back said "I don't think so." At that point since we live on a small street I asked Nana what she thought of the idea of leaving the plywood in the road until I could bend over at some later date. Well we managed to get it into the garage but the job was on hold for another week.

This picture is of the first assembly of the table legs. Eventually the legs were assembled and disassembled I think three times. I would get it all together and another "guess what" would show up.

Same assembly, different angle. The back of the table was only disassembled one time. We shortened the length so one end of the table would have an overhang to allow a wood vise to be hung on the extreme right side outside of the legs.

After reassembly, the ends were taken off two more times to shorten them to allow overhang of the table top for using wood clamps.

The top of the work bench was cut to a thirty inch width and squared up all the way around. The top measures 96 inches wide by 30 inches deep.

If you look at the bottom shelf in front of the stool you will notice an indentation cut into the shelf. In a previous life this was a computer table top and that was were the computer operator set. The bottom shelf is the 18 inches removed to make the top of the bench 30 inches wide. This is a very sturdy workbench and the Blushing Bride was well pleased.

A final shot of the bench and wall shelf system over the bench.

A Day At The Jacksonville, FL Zoo

Nana and Cheez went to the Jacksonville Zoo with some of our kids and grandkids. It was very warm, but we all survived. Here are some of the critters observed at the zoo. We all got the admission/train ride admission, a red wrist band.


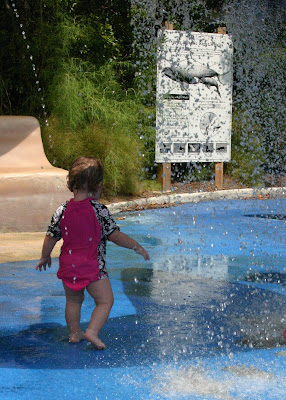
Inside the zoo is a small water park. It is well run with plenty of friendly staff. The perfect place to cool off the kids and give the grandparents a break. Adults were allowed in with their kids if they so desired. There were probably 25 - 30 kids in the water area, I believe it is limited to about 80 at one time.


The zoo has a train that circles around the outer perimeter. It basically has two stops, front of park and back of park. It was a nice little ride. I believe it costs $4.00 extra but it gets you off your feet for a few minutes and the rides are unlimited.


I thought this flower was strikingly awesome. The little sign next to it said "Orange Bottlebrush Ginger." (Hedychium coccineum, also known as orange gingerlily, scarlet gingerlily, and orange bottlebrush ginger), is a species of flowering ginger. A native of Asia, it grows on the edge of forests and in mountain grasslands. Hedychium coccineumcan prefers partial sunshine, but can tolerate full sun. The flowers can range in colour from red to orange to almost yellow.)

Some G-Force Guy Time


My grandson is visiting here from the FT Bragg, NC area and said he wanted to see the movie G-Force and have a little guy time. So we went to McDonald's for lunch, saw the movie and ate some popcorn. He said he had a great time and he really like the movie.

He recommends G-Force and so do I.

Driveway And Parking Modifications A Job In Progress

My house was built with a tight curve in the driveway leading to the proposed RV parking. In this driveway, backing in a dually and staying on the concrete is exciting even without a trailer. So I decided to extend the driveway to make it easier to get in and out of and increase my available parking. Concrete is expensive, so is crushed concrete and coquina rock. So I decided to go with Cypress mulch. Originally I thought of going all the way to the road, but my landscaper pointed out that water flow in the drainage area would wash away the mulch. So I decided to end the mulched area before the ditch, outline the mulched area with landscape timbers and then taper the ground up to the parking area without restricting the available drainage.

Every time I come up with a project I always overlook Murphy's Laws of Projects. Well Murphy arrived almost immediately as the project began.

This is the area, right behind the utility shed, where I told the Bobcat operator to dump the soil removed i preparing the area to be mulched. The idea was to build up an area where I could later build a gardening bench for Nana.

As the Bobcat operator dropped the first load, all I saw was a huge strip of beautiful sod that would soon be buried. I then directed the Bobcat operator to lay the piles besides each other and Nana and I spent the next couple of hours pulling as much sod as we could out of the piles and laying them behind the house to extend our yard. All this happened with the heat index well over 95 degrees.

This picture shows some of the sod we managed to get down. It was rip it out of the pile and stamp it down a little farther away. Nana was also spreading bags of manure on and watering the area where we laid the sod.

Ultimately, we had to tell the bobcat operator to spread around and flatten the rest of the sod because we were to tired to move any more of it. In a couple of months, the centipede grass involved will come right up through the dirt and fill in a lot of that area.

Eventually, the Bobcat operator ripped out the sod, removed a bunch of dirt, laid groundcloth and filled in the area with Cyprus Mulch.

From this view you can see where I laid the first line of landscape timber. Originally I thought of going all the way to the road, but my landscaper pointed out that water flow in the drainage area would wash away the mulch. So I decided to end the mulched area before the ditch, outline the mulched area with landscape timbers and then taper the ground up to the parking area without restricting the available drainage.

The landscape timbers on the street side are pegged to the ground with one inch diameter oak dowels 18 inches in length.

The top of this picture shows the area being built up to allow driving in and out over the street side timbers. I hope that will keep the timbers from shifting as vehicles enter and leave the driveway.

This is one of the street side dowels along with the five pound precision instrument used for their installation.

Regardless of location, each eight foot landscape timber will be held in place by three dowels, shorter timbers will have at least two dowels. The dowels along the side of the parking area where no vehicle traffic is expected are 3/4 inch poplar dowels instead of one inch oak, they are also 18 inches in length. All dowels were treated with waterproofing to increase their usable lifetime.

Here the dowel has been inserted into the landscape timber.

This area between the back end of the driveway and the utility shed is also being prepared for the Cyprus mulch.

The distance from the driveway end to the utility shed is about 21 feet. This is mainly for looks as it fills in a no grass area however, if I had a long fifth wheel it could overhang over this area and be out of the way.

Once the mulched area is outlined with landscape timbers, I will build a ramp up to the utility shed for the lawn tractor. In this view you can see I have to install the timbers at both ends and then finish spreading the mulch evenly.